Dialog Compression: Master with the Vertigo VSC-2 Pt.7
 By: Denis Sebastian Tamas | Unsplash
Do you want to learn how to produce better sounding masters of your spoken word recordings?
Who wouldn't want your dialogue to have that clear, polished sound that connects emotionally with your listeners?
Today I'll help you get one step closer to that goal by showing you how to use a compressor that's tailor-made for the job.
You'll learn some simple techniques to set it up and use it specifically for your dialogue mastering sessions.
So let's jump in and learn to use the Vertigo VSC-2 compressor by Brainworx.
Why It's Great For Mastering Dialogue
First of all, when we're talking about "masters" this just means the final, polished version of your spoken word audio that's ready to be released.
Accordingly, what makes the Vertigo VSC-2 so valuable when you're mastering that audio has everything to do with its sound.
More specifically, you could say its lack of a prominent sound is the compressor's huge asset for your voice-over for video, podcast or audiobook.
The sound quality that it imparts to spoken words is extremely subtle, but it could be described as "clean or clear sounding".
In fact, if you listen to my reading of this article (TOP OF PAGE IN BLUE BOX), you are enjoying the sound of this compressor in my words!
Furthermore, the Vertigo VSC-2 does its work while contributing an overall glossy sheen to your words mostly heard in the upper midrange and high frequencies.
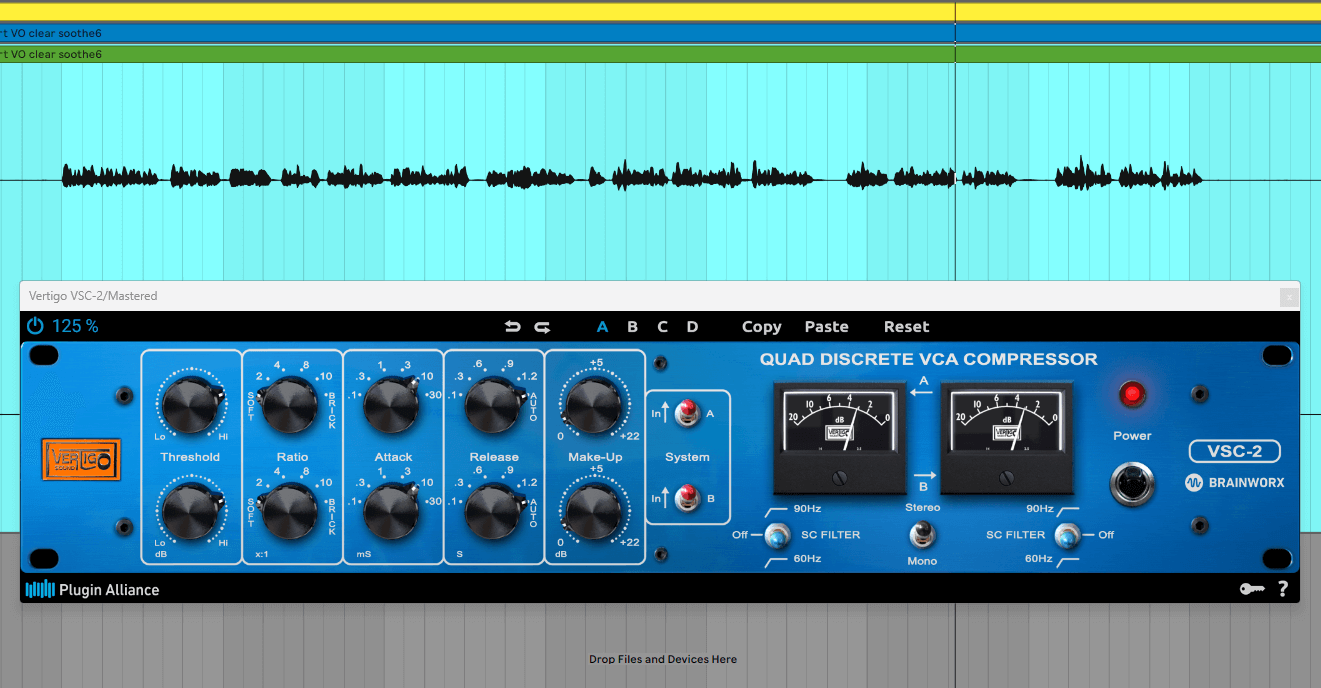
[ The Vertigo VSC-2 Compressing Spoken Word Audio in a Mastering Session ]
This means you tend to get a very subtle boost in and around the "clarity region" of your words using the compressor in your mastering chain.
And this kind of clarity or intelligibility is always an overarching goal for spoken word recordings.
We are working to provide a clear and transparent sound enabling your words to be easily understood by your listeners.
Along with the beautiful sound quality, the compressor is of course reshaping the loud and quiet parts of your dialogue.
It especially excels at controlling those sudden bursts of loud or energetic speaking without distorting them.
And this is no small feat when it comes to compressors, so we could say that the VSC-2 shines when it comes to containing the dynamic peaks often found in dialogue audio.
For all those reasons, the Vertigo VSC-2 is an ideal compressor for helping to reach loudness levels with clarity during your dialogue mastering sessions.
Preparing for Mastering
See the steps below for how I'd typically dial in the Vertigo compressor in my mastering session for a video voice-over (or a podcast, sermon or audiobook).
Be aware that these steps assume you've already done what needed to be done to get your dialogue recording in shape for mastering.
Maybe that meant capturing a great sounding recording in a controlled space that didn't need much editing...
Or maybe you did some sculpting and editing to get a decent sounding spoken word recording sounding even better.
Whatever the case, at this point your dialogue should already be in good shape as you prepare to process it in your mastering chain.
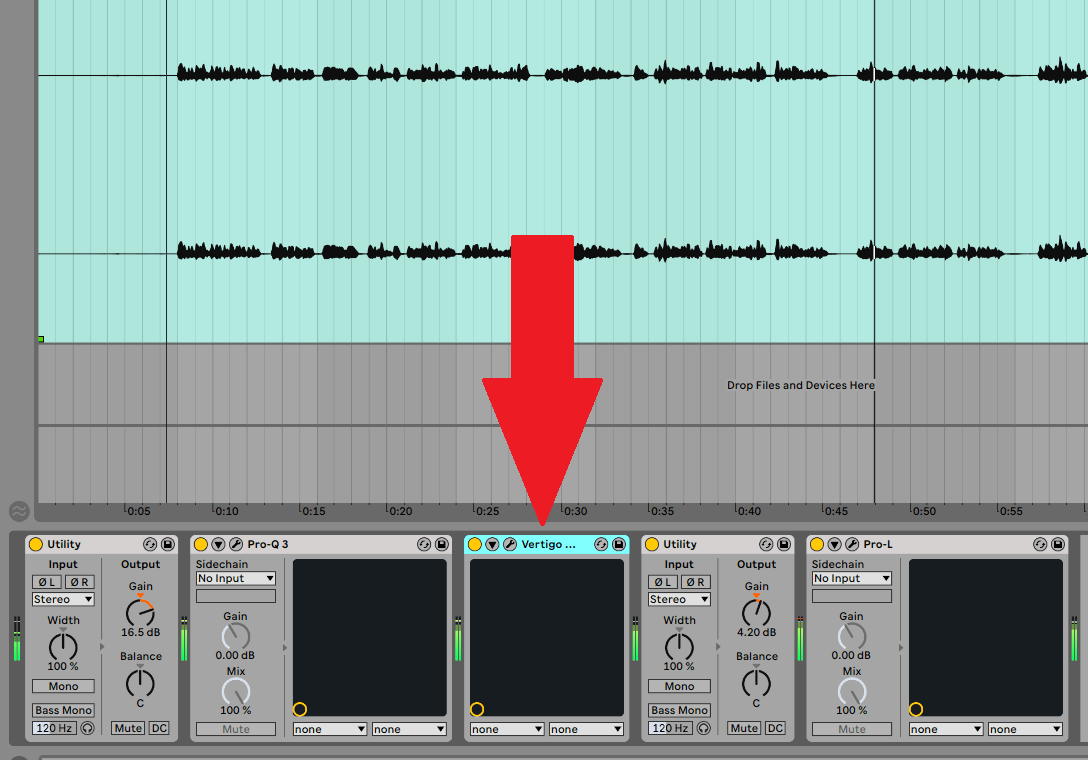
[ The Vertigo VSC-2 in a Mastering Chain ]
And speaking of mastering chains, it would be good to mention that you aren't using the compressor by itself or separately on your voice-over.
You may have used a compressor separately when you leveled your audio earlier in the process, but this is a different scenario.
During the mastering phase, the Vertigo compressor is in a group of plug-ins working together to process your dialogue: a mastering chain.
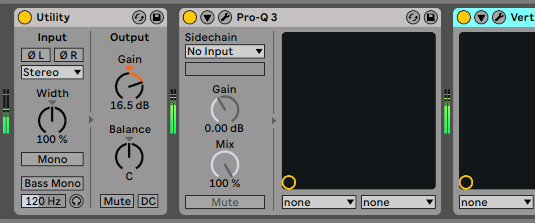
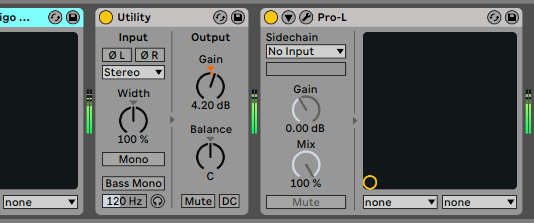
For example, take a look at the image of my mastering chain for a spoken word audio project below.
I've zoomed in to the left and right sides of the chain for easy viewing (the Vertigo compressor is the blue colored box that's split in half):
[ My Dialogue Audio Mastering Chain ]
The mastering chain plug-ins IN ORDER are:
- Gain ("Utility" from Ableton Live)
- Corrective EQ ("Pro-Q 3")
- Compressor ("Vertigo VSC-2")
- Another Gain ("Utility" from Ableton Live)
- Limiter ("Pro-L")
So there are two plug-ins before the Vertigo VSC-2 and two after, all working together to construct the finished "master".
And this is where I would suggest placing the compressor in your chain (after the corrective EQ and before the limiter).
Make sure to adjust the corrective EQ in relation to a similar, good sounding dialogue reference.
Finally, the gain order allows you to make mastering decisions at a consistent volume level from the start of your session as taught by Ian Shepherd and the limiter is for safety from clipping.
This mastering chain arrangement will be a beneficial framework for setting up your own dialogue mastering chain - I encourage you to try it out!
How to Use It
Now that you have the Vertigo VSC-2 compressor situated in your mastering chain, here's how to set it up for your spoken word mastering sessions:
1. Pull up the plug-in within your spoken word mastering session...
-- resize the plug-in for easier viewing by clicking on the blue number (50% - 150%) in the upper left-hand corner of the plug-in:
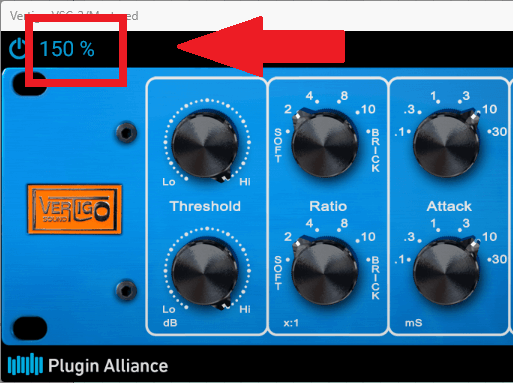
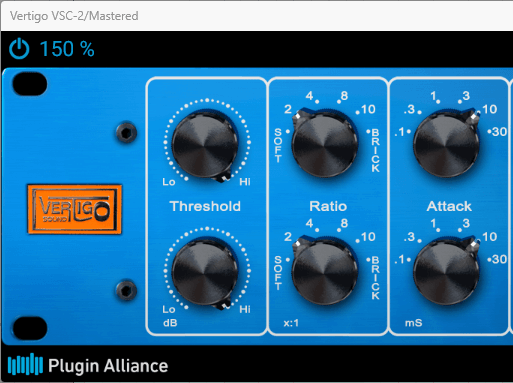
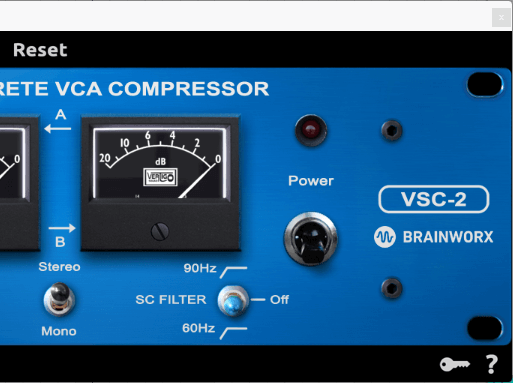
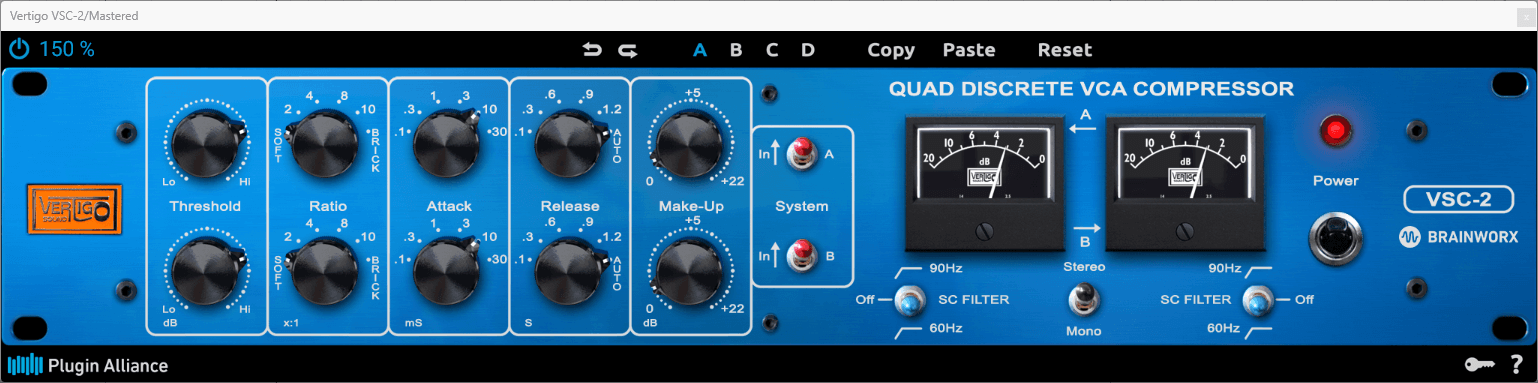
2. This is what the plug-in looks like when I pull it up in its default state - check that it looks the same when you open it...
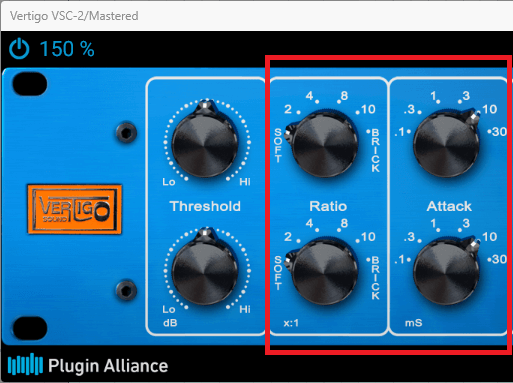
-- I've zoomed in to the left, middle and right of the plug-in for easy viewing of the knobs and switches:


3. If your DAW lets you open a preset in the Vertigo VSC-2, open the "Spoken Word Compression -4dB GR" preset...
-- it should look identical to the images below:


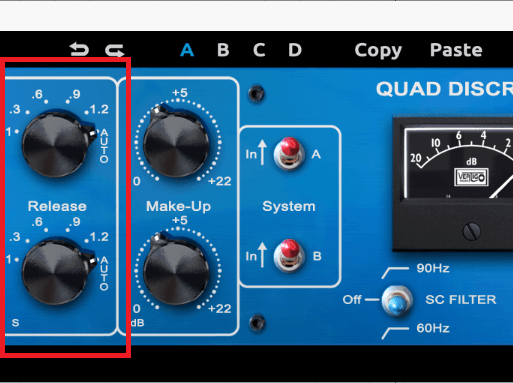
-- but if you can't open the preset, don't worry - set the 5 vertical groups of 2 black knobs on the left half of the plug-in as you see them below:
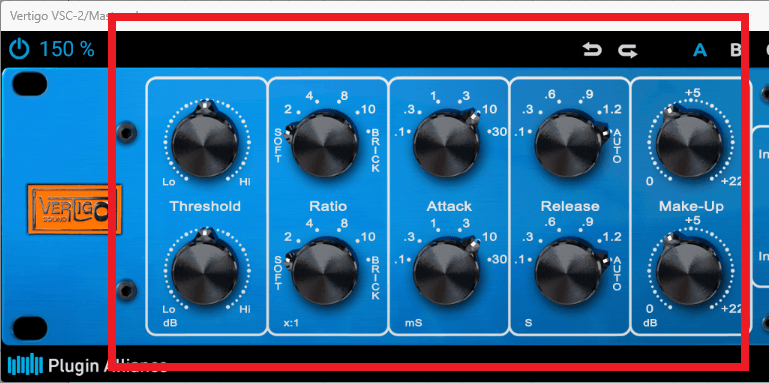
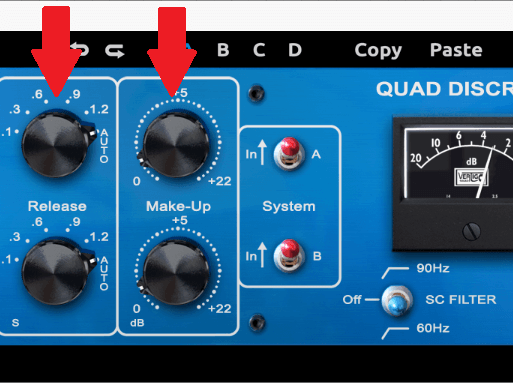
-- make sure the "Ratio", "Attack" and "Release" groups are set as listed below...
-- Ratio: "Soft"
-- Attack: "10"
-- Release: "Auto"
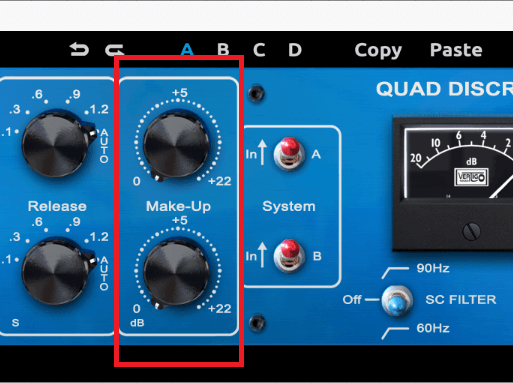
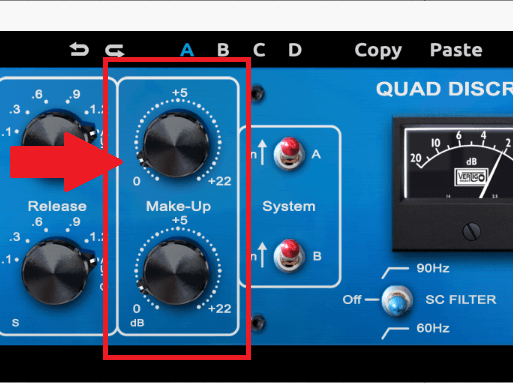
-- "Threshold" and "Make-Up" are less important since they'll be changed...
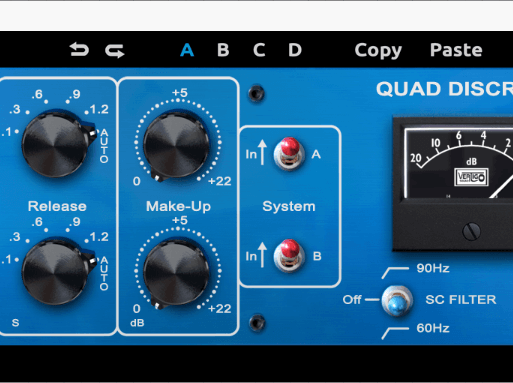
-- don't worry about the switches on the right half of the plug-in - those are already set from the default state in step 1:
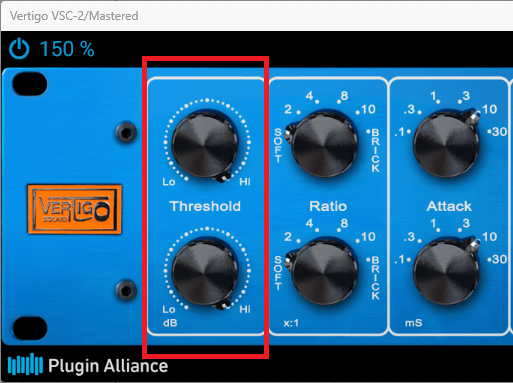
4. Next, pull the "Threshold" all the way UP to the "Hi" marking (at +11.8 dB) and the "Make-Up" all the way DOWN to the "0" marking...
-- then start playing your spoken word audio through the compressor:

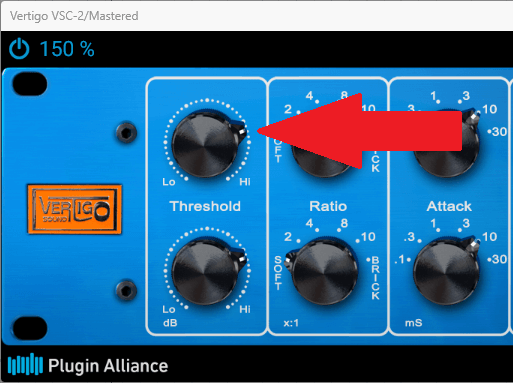
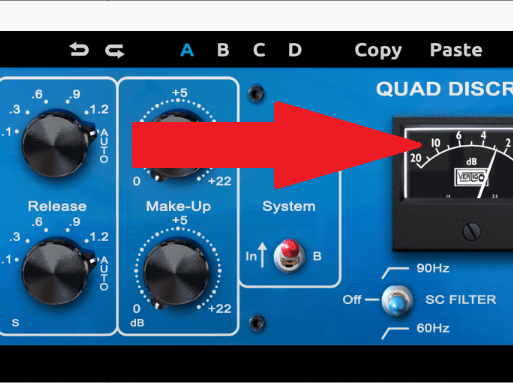
5. Now, pull the "Threshold" DOWN (to the left) until the loudest parts of your dialogue are hitting roughly around 4 dB of gain reduction on the black meters...
-- don't try to match the "Threshold" setting in the image below...
-- that's because yours will be set at a different level depending on the loudness of your audio...
-- the quieter parts of your audio will register lower than 4 dB on the meters (maybe somewhere between 1 and 3 dB):
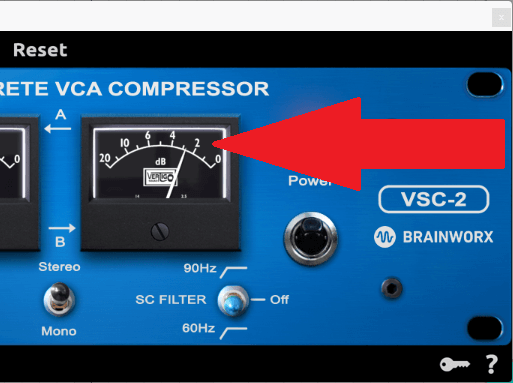
6. Next, bypass (turn off) the compressor to hear the difference in volume between the compressed vs. uncompressed audio...
-- hearing the volume difference will guide you to set the "Make-Up" gain...
-- the goal is to erase any volume difference...
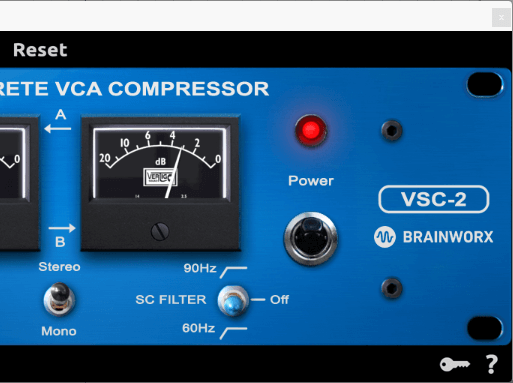
-- bypass the compressor by clicking on the blue "On/Off" power symbol in the upper left-hand corner:
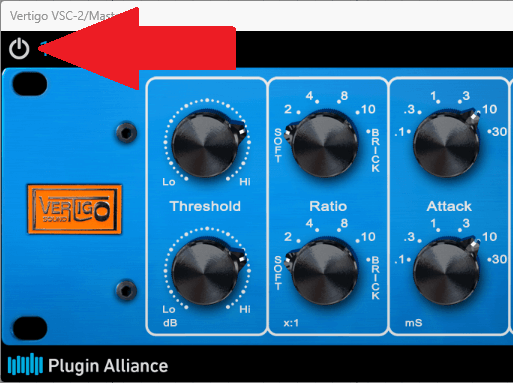
7. Turn the compressor on and off several times listening carefully to your dialogue - you may hear the volume increase when the plug-in is off...
-- this is a clue to INCREASE the makeup gain...
-- turn the "Make-Up" knob to the right (increase gain) until there's no difference in volume whether the plug-in is "on" or "off"...
-- for my spoken word audio this was around +1.8 dB of makeup gain (BUT IT WILL BE DIFFERENT FOR EACH SITUATION):


8. Now the compressor is volume matched so you can actually hear what the compressor is adding to the sound of your words...
-- listen again closing your eyes while turning the compressor on...and then off to hear how it affects the sound of your mastering session...
-- now you aren't being fooled by "louder sounding better", but are really hearing the subtle, smooth effect of this wonderful compressor on your dialogue...
-- see the final settings for my dialogue mastering session below (though your "Threshold" and "Make-Up" will vary):

Summary
Remember, the Vertigo VSC-2 compressor is highly suited to mastering spoken word recordings because of its subtle polishing effect.
This polishing, along with the compressor's ability to contain loud speaking, helps your words come through crisp and clear.
Next, make sure your dialogue has been thoroughly cleaned up and edited before processing it with a compressor in your mastering session.
After that, you're ready to place the Vertigo compressor in a logical order of processing in your mastering chain (see my example).
Finally, follow the steps above to allow the Vertigo to enhance your dialogue masters with a polished and professional sound that connects with your listeners.
Have YOU used the Vertigo VSC-2 to master a voice-over for video or podcast?
What other suggestions do you have for compressing spoken word audio during mastering?
Would love to hear your thoughts below!

Cheers, Bryan
Your Dialogue Editing Mentor
Transform Your Dialogue Recordings to Sound Professional
Grab My 20-page Guide Packed With Tips To Easily Improve Your Audio Today!
I'll send emails once a month with valuable free content. No spam - unsubscribe at any time.


